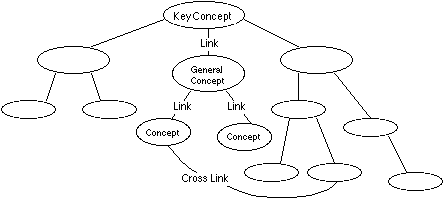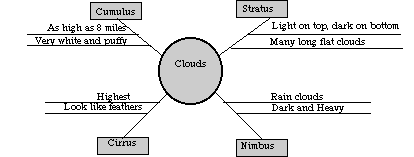
Graphic organizers provide a visual representation of facts and concepts and their relationships within an organized frame. They aid learning and thinking by helping to represent abstract information in a more concrete form, depict relationships among facts and concepts, relate new information to prior knowledge, and organize thoughts for writing. Graphic organizers exist in a variety of forms.

Individual formats can be used to create a graphic organizer for a specific topic:

A number of graphic organizer computer programs exist. Inspiration is one such program, which allows you to switch back and forth from graphic to outline mode. This program is available on the computers in the library.
At home, you can use graphic tools in Microsoft Word or Microsoft PowerPoint to create graphic organizers for presentations and reports (other drawing programs such as Paint, ClarisWorks, or Microsoft Works can also be used):
- Use the drawing or graphics toolbar in Microsoft PowerPoint or Word.
- Use the AutoShapes pop-up menu to select the kind of shape you want to draw. Then, click on one of the classes of shapes, such as Basic Shapes, to see available options.
- Select which of the Basic Shapes you want to draw and click on it.
- Then, position your mouse pointer in your document where you want the shape to be, and hold down the mouse button as you draw the shape. Near the AutoShapes menu is the color fill "paint can" which can be used to color your autoshape. Also near the AutoShapes menu are line tools, which can be used to connect your shapes. Lines can also be selected and color added. A little experimenting will often produce great results.
- Now that you have shapes, you will want to write in them. First, you need to select the shape by clicking on it. You will see little handles appear around the shape.
- Next, you will use the Insert pull-down-menu and choose "Text Box" by clicking on it.
- Then, go back and click inside the autoshape to insert the text box. If you click right in the middle of the autoshape when you are inserting the text box, you will fix the position of the text box in the center of the autoshape, and it will move with the autoshape if you reposition it as you add more items.
- You can go back to the Insert menu and change the appearance of the texture, line thickness, and other features of both the autoshape and text box later. Your results will improve with practice.
- After you have all the elements of your graphic organizer or concept map in place, you can then group all the shapes, lines, and text boxes together as one object, which can then be moved around. Hold down the Shift key as you click on the items you want to group together; you will see little handles appear around each shape. Then use the "Group" function in the "Draw" menu to join them all together.
- You can also save your graphic organizer as a "gif" file or "jpeg" file for importing into other documents, or web pages at a later date. Computer technology and library media staff will gladly help you with this if you decide to use a computer generated concept map for your project.
Although handwritten graphic organizers can be used, there are certain advantages to creating them on a computer. Revisions can be made without having to rewrite the entire organizer. Color, texture, and shading can be added, and a wide variety of fonts can be used. The computer generated organizer can also be mounted on a web page, or sent by email to a classmate for editing, or to a teacher for grading.
To locate items in the library catalog, search in iBistro. You may want to limit your search to search only the Keeley Library, instead of all of the SAILS libraries.
As members of SAILS, Durfee students and teachers can access journal and newspaper articles as well as online reference books, from the library's computers and from home. Simply go to the online catalog page, access the online catalog, and click on  .
.
Return to Keeley Library Course Resources
Last Updated: May 25, 2014